In this tutorial, I will show you how to make planet, star and meteor impact in Photoshop in a quick and effective manner. This is intermediate level tutorial so some steps can be a little tricky, but why not have a try :)
The PSD file of this tutorial is available to buy on PSD Vault Shop, or via the PSD Vault VIP members area.

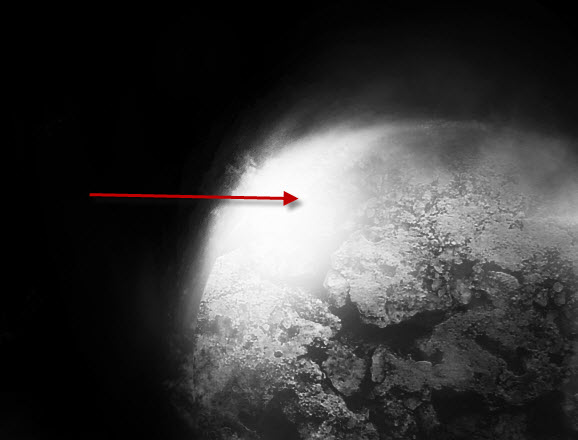
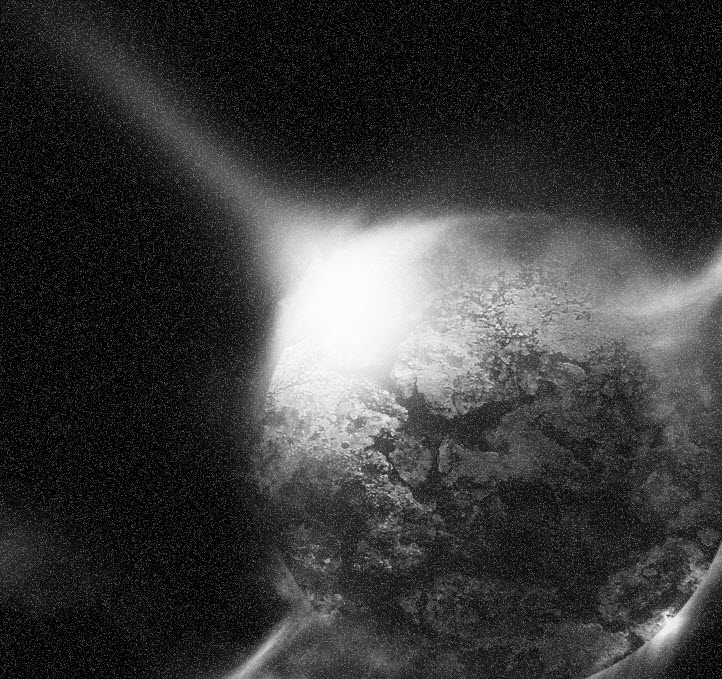
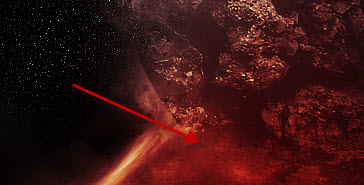
Here is a preview of the final effect I have for this tutorial: (click to enlarge)

PSD Vault VIP Membership
You can download the PSD File for this tutorial via the VIP Members Area for only $6.95/Month (or less)! You will not only get this PSD File, but also 200+ other PSD Files + Extra Goodies + Exclusive Photoshop tutorial there. Signup now and get exclusive!

OK let’s get started!
To complete this tutorial, you will need the following stocks:
Step 1
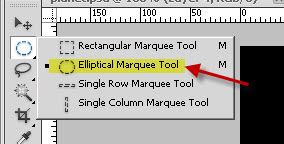
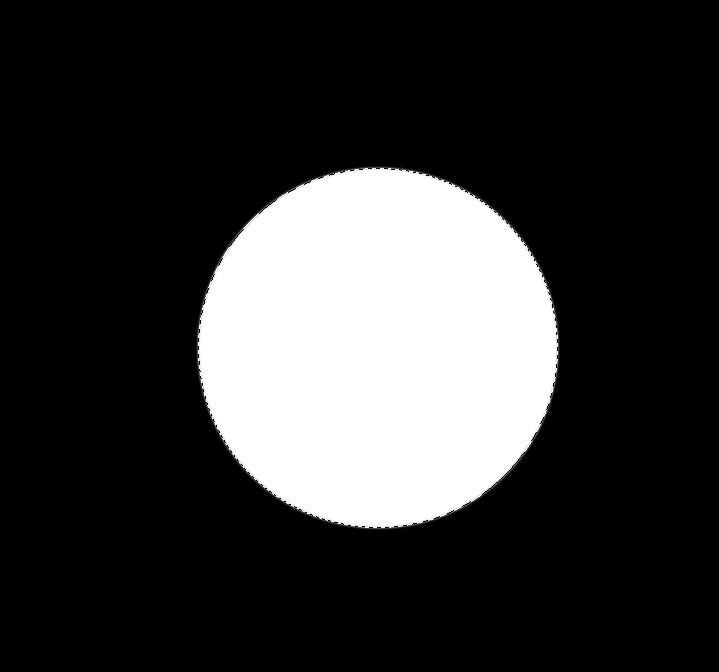
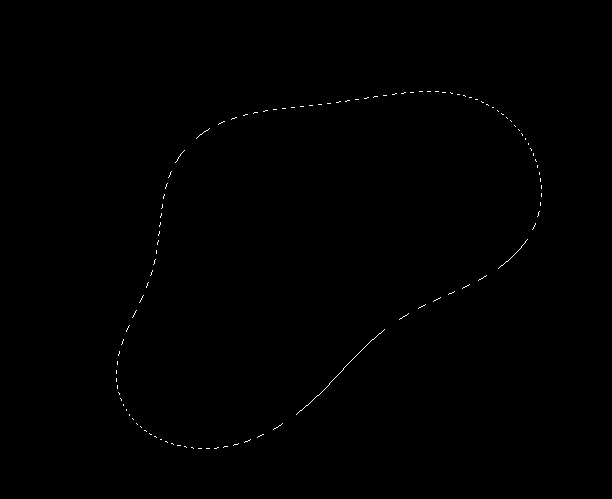
Create a new document sized 740px * 700px, fill the background with black colour. Create a new layer called “planet”, and use the Elliptical Marquee Tool with 1px feature, hold down Shift Key and draw a circle as shown below:
Press Shift + F5 and fill the circle with white colour:
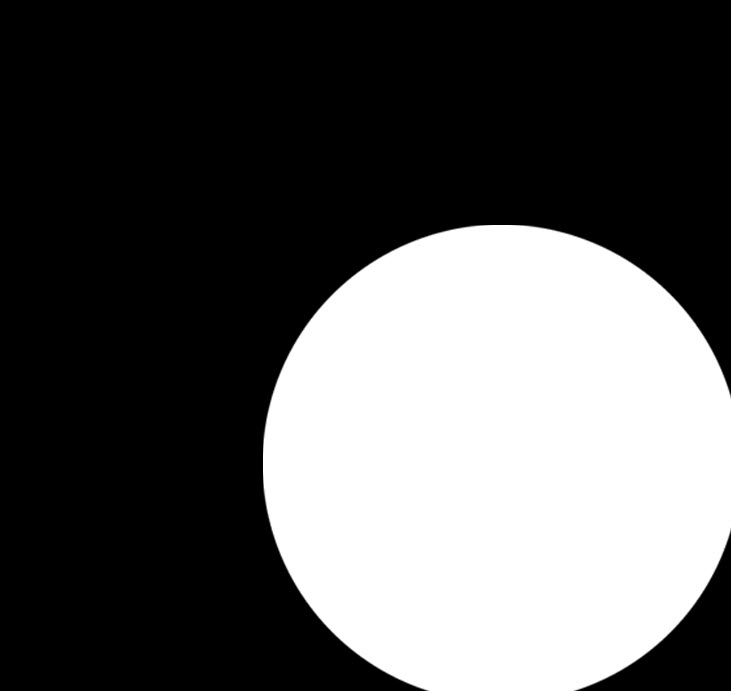
Move this circle to the bottom right corner of the canvas:
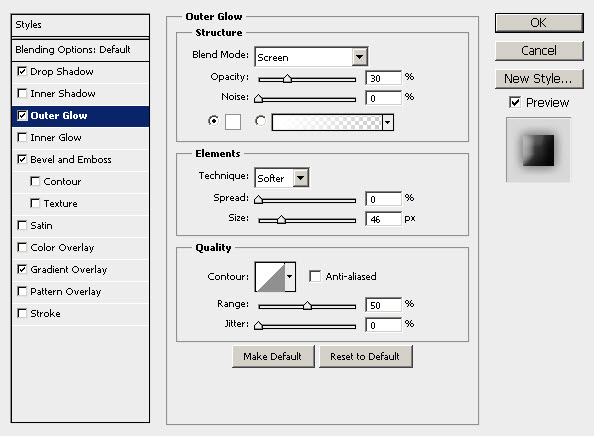
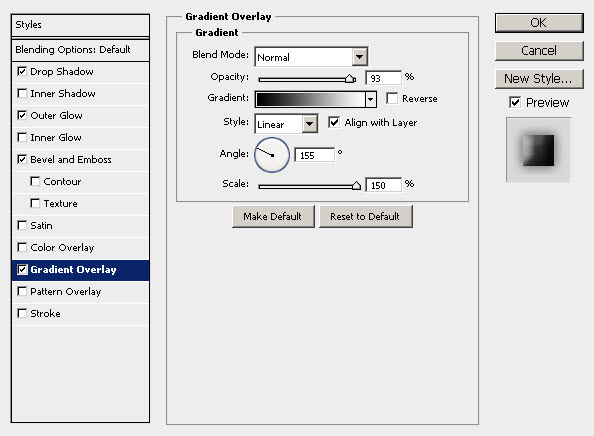
On this planet layer, apply the following layer blending options:
Drop Shadow

Outer Glow
Bevel and Emboss

Gradient Overlay
and here is the effect so far:

Step 2
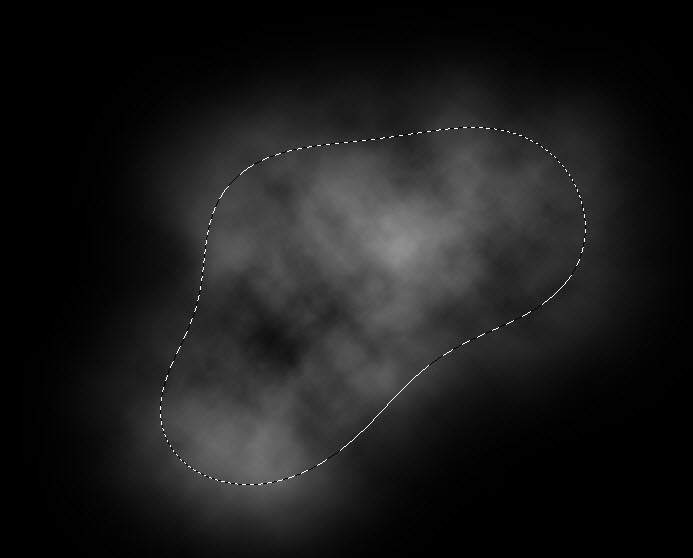
New I would like to add some irregularly lighting around the planet. To do this, add a layer mask on the planet layer as shown below:
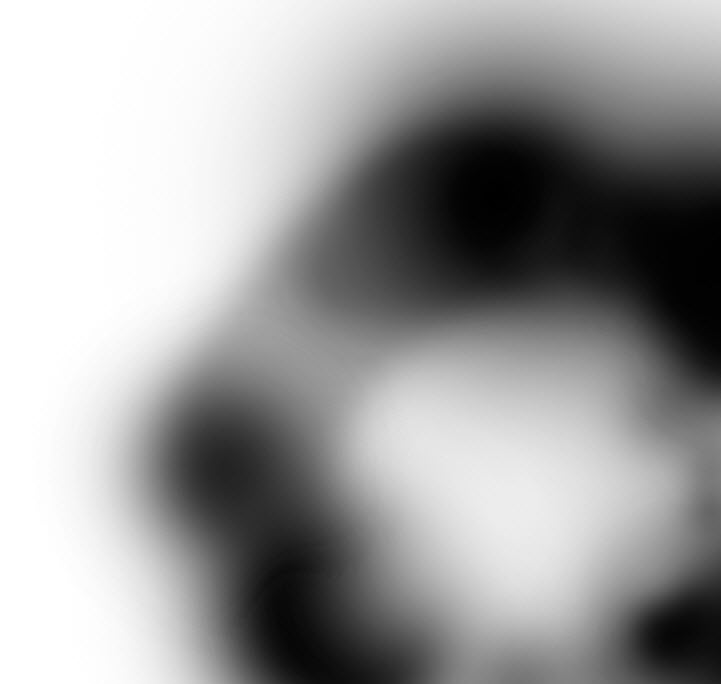
and here is the effect after applying the layer mask:
Load the “Soil Texture” into Photoshop, load the selection of the planet layer and move the selection onto the soil texture, then copy and paste a piece of soil onto our canvas as shown below: (make sure you fit the selection to the planet circle we drew before)

Change the blending mode of this soil layer to “Overlay”, drop the layer opacity to 65%, you will have the following effect:

Add the following adjustment layer to the soil texture layer: (make sure to tick the “use previous layer as clipping mask” option)
Black and White
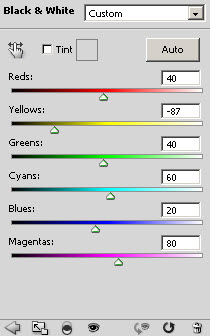
Levels

and here is the effect so far:
Step 3
Now let’s add a bit of cloudy effect around the planet to make it look more mysterious. Create a new layer called “cloud” and use the Lasso tool with 50px feather to draw a selection as shown below:
Render some cloud inside the selection as shown below:
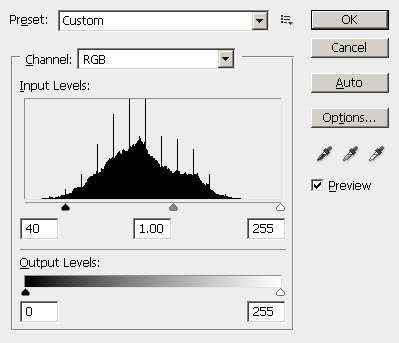
Press Ctrl + L to bring up the Level adjustment tool, apply the following settings to add some contrast in the cloud:
Warp the cloud as shown below:

Then resize and rotate the cloud if necessary, and make a few duplicates of the cloud layer, scatter them around the planet to areas shown below:

Keep adding more cloud effect around the planet by duplicate the cloud layer a few times, adjust the layer opacity along the way to fine-tune the effect:

Step 4
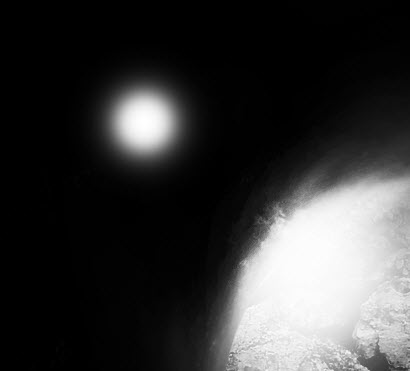
Now let’s add a simple meteor effect to the planet. Create a new layer and use a big soft brush with white colour, do a single click to the area shown below, adjust the brush size accordingly:

Duplicate this light layer twice, change the blending mode of the duplicated layer to “soft light”:

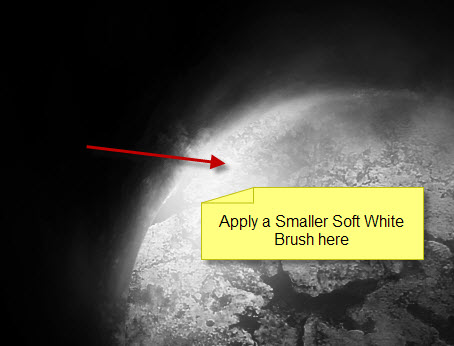
Then create a new layer, this time use a smaller soft white brush, do a single click to the spot shown below:
Duplicate this smaller light layer twice, and change the blending mode of the duplicated layer to “overlay”, you will have the following effect:
Create a new layer on top of all previous layers, use a soft white brush and do a single click to the position shown below:
Distort this dot as show below:
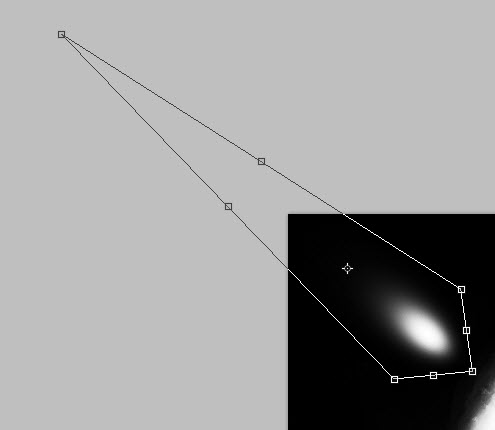
Hit Enter, then apply the distort option again as shown below:

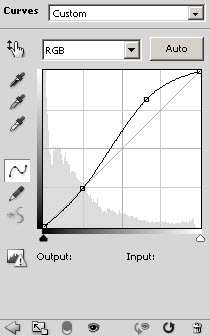
Add a Curves adjustment layer on top to tweak the image contrast a bit:
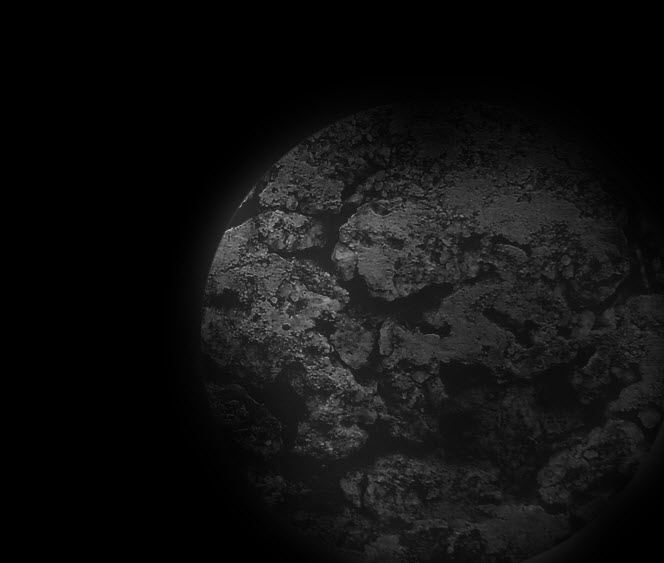
and here is the effect I have so far:

Step 5
Now let’s add a new layer called “Star” on top of all previous layers, fill the layer with black colour, and go to Filter > Noise > Add Noise and apply the following settings:

Change the blending mode of the star layer to “Screen”, you will have the following effect:
Of course we don’t want the entire canvas to be covered with noise, so use a soft eraser to remove the areas where you don’t want the noise to appear:
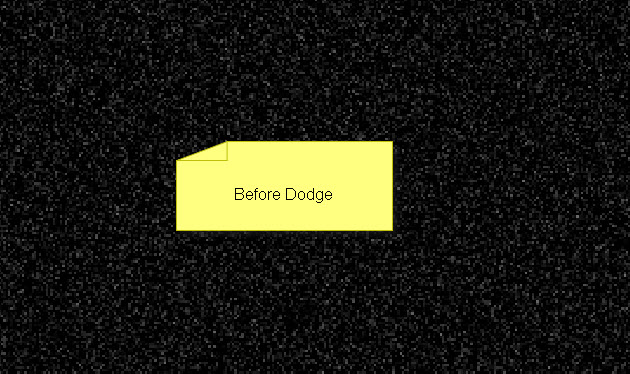
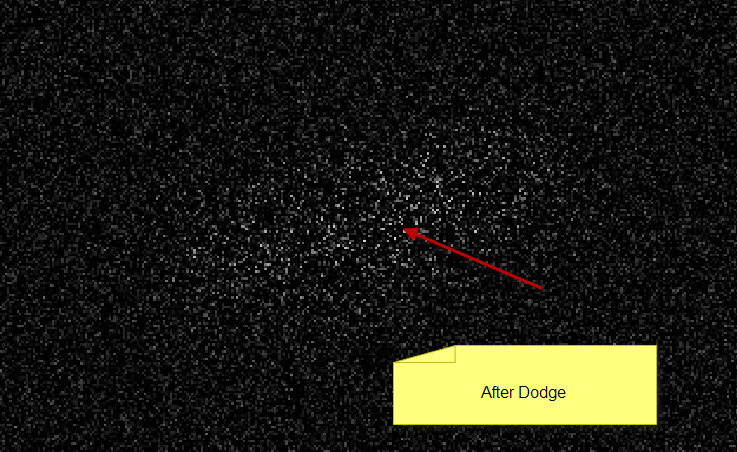
For add some depth to the star field, we can use the dodge tool to highlight centain part of the image where you want the star to become brighter than others:
For tutorial purpose, here is a before and after view of the dodge tool so you can the effect: (the setting for Dodge Tool is Midtone, and Exposure 70%)
Before:
After:
and here is the effect so far:

Step 6
Ok we’re nearly done. For the final tune-ups, I flattened the image, (good idea to save an extra copy before you do so), duplicate the background layer once and applied the Smart Sharpen filter on the duplicated layer:

I also added a colour layer on top and added some color to the areas indicated below with a soft brush:
The area where meteor effect is:

and the bottom left portion of the planet:
For adding some painting effect to the image, you can again duplicate the background layer, then use the “Accented Edges” filter under the Brush Strokes option on the duplicated layer with the following settings:

As you can see, certain part of the image will have some brush stroke effect:

You can also add a layer mask to hide certain parts which you don’t want the painting effect to show:

and here is the final effect I have for this tutorial: (click to enlarge)
OK that’s it for this tutorial! Hope you enjoy it and find it useful and inspirational. If you have any question, drop a comment below and I will try my best to help you out.
Cheers and have a nice day!
13 Comments
Cool effect,
I will try it now
step 2 makes no sence ewhat soever ,im adding the and its not achieving irregular lighting could somebody pleasreword that step so it makes sence
@glenn: basically what I mean is by adding a layer mask as shown in the step 2, we can hide centain portion, or reduce the visibility of certain portion of the planet. Make sure when you apply the eraser tool on the layer mask, adjust the flow and opacity as you go. The screenshot of the layer mask shoud give you an indicative idea.
Hope this helps.
Awesome, but there’s many steps i couldn’t understand it, anyways i this i have create something i’d like to show :)
thanks btw
To make this effect works you have to try and try and try .. never give up.. Once you done it.. you will remembered it, dont just ask people, train yourself .. Even you’re mastered in Photoshop you have to trained your self alone, anyone can do this but you have to do it better.. :D
I know it’s hard for the newbie’s but trust me the hardest part is “how to teach people”.. Train yourself and i pretty much sure .. one day you can do it.. :D
it would be a great help if u told us what colours u used , good tutorial tho
Hi, I love your web site and I signed up for a year because I think that it’s worth supporting. So I’m totally new to this and I’ve tried a few of you tutorials so far. It can be a challenge trying to learn where all the tools are and how to use them but it makes for great learning. One thing I’m having a total hard time with is adding color and makeing look as good as you do (this project for example) could you send some hint on how I can do it better? Maybe I’m just not using the softbrush right. Or maybe do a youtube video showing how you do this?
Thanks!
Hey, to the person who wrote this tutorial (James?), Thanks!
I really liked this one it was short and sweet but, offered a great result. The only tricky part was getting the color and actual layer styles to match up. But, I guess I can dial that down to version differences. I am using CS5.
Thanks,
Jason
this is way to hard
Awesome effect !
I’m do it now! Thanks
Nice Effect! Thanks
Keep up the Good work
Greattt tutorial man. but in the last part, added a colour layer ,
what that means?
Yes I have the same problem as El_barrio_mark how do I make this colour layer and the colours as well??