Close Menu
PSD VaultPSD Vault
  • VIP Area
  • Photoshop Basics
  • Photo Effect
  • Text Effect
  • Premium Tuts
  • Resources
  • Drawing
  • Inspiration
  • Web Graphics
  • Abstract
  • Freebies
  • Advertise
  • Get in Touch
  • About PSD Vault
Facebook Instagram Pinterest YouTube TikTok
Facebook Instagram Pinterest YouTube TikTok RSS
PSD VaultPSD Vault
  • VIP Area
    • Sign Up
    • Log In
  • Photoshop Basics
  • AI
  • Photoshop Error Fixes
  • Video Tutorial
  • Photo Effect
  • Text Effect
  • Premium Tuts
  • Drawing
  • Opinion
PSD VaultPSD Vault
Home»Photo Effect»Human Photo Manipulation with Nature and Grunge Element in Photoshop
Photo Effect

Human Photo Manipulation with Nature and Grunge Element in Photoshop

By James QuSeptember 4, 20134 Mins Read
Facebook Twitter Pinterest LinkedIn Tumblr Email
Share
Facebook Twitter LinkedIn Pinterest Email

In this tutorial, I will show you the process of creating this create an intriguing manipulation by mixing nature and grunge elements in Photoshop. This will be an interesting experiment for you to use tools such as image adjustment layers and layer blending modes, as well as practice the use of liquify filter and brush tool.

The PSD file of this tutorial is available via the PSD Vault VIP members area.

Here is a preview of the final effect I have for this tutorial: (click to enlarge)

PSD Vault VIP Membership

You can download the PSD File for this tutorial via the VIP Members Area for only $6.95/Month (or less)! You will not only get this PSD File, but also 200+ other PSD Files + Extra Goodies + Exclusive Photoshop tutorials there. Signup now and get exclusive!

OK Let’s get started!

To complete this tutorial, you will need the following stocks:

Grunge Brushset (Pick a few from the list)

Model by ~Neriah-stock

Nature Photo

Step 1

Create a new document sized  900px * 1169px with black background. Use the the grunge brushset you download, paint some random patterns on the canvas as shown below.

Hint: You will need to set the brush flow and opacity to around 40%-60% in order to achieve more depth. You can use eraser tool to fade certain areas of the painting as well.

Cut out the female from the model stock image and paste it over to our document, resize it as shown below:

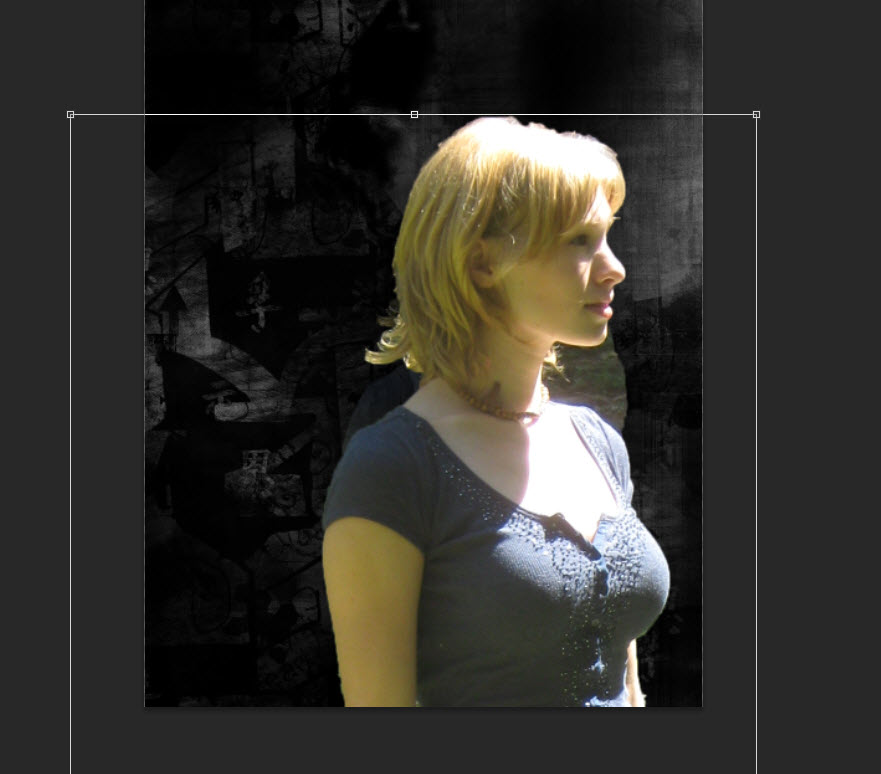
Use the Surface Blur to smooth out the model layer with the following settings:

Then we can use the grunge brushset as eraser, remove the edges of the model layer as shown below:

Please note that you can adjust the opacity and flow of the eraser tool to add more depth when removing the body texture:

Step 2

We can now add the following adjustment layers as clipping mask to this model layer:

Black and White

Apply the following layer mask on this black and white adjustment layer:

and this mask will create the following “Highlight” effect:

Levels

Apply the following layer mask on this levels adjustment layer:

Use a soft white brush, paint a shining dot over the mode’s eye, this will create a surreal effect for our image:

and here is the overall effect so far:

Step 3

We will add the nature pattern into our image. Load the nature photo into Photoshop and use the Lasso Tool to select a piece of the grass and flower as shown below:

Note: set the Feather value to 40% for this lasso tool.

Copy and paste the selection to our document, apply the following levels adjustment settings to this new nature layer:

Change the blending mode of this layer to “Screen”:

and you will have the following effect:

We can duplicate this nature a few times and attach them to different parts of the body, as shown below:

Step 4

We will add some liquify effect to our document. Create a new layer and use a lime/yellow brush to paint a line as shown below:

Go to the liquify settings under the “Filter” top menu, grab the forward warping tool and set it according to the following values:

Warp this line as shown below:

Then, use a soft brush to paint some soft dots connecting the lines:

Step 5

We will now add some touch-ups for our image. We can flatten the layers and apply this following Unsharp Mask filter to sharpen the image a bit:

This unsharp mask filter will make the details of the nature pattern stand out:

We can also render some cloud down the bottom with the cloud filter, or brush. Remember to keep this cloud effect subtle by reducing the layer opacity to around 30%:

I then adjusted the colour balance a bit with the colour balance adjustment layer, and here is my final effect: (click to enlarge)

That’s it! Hope you enjoy this tutorial and find it useful. Drop me a comment below if you have any question.

Till next time, have a great day!

element grunge manipulation nature photo
Share. Facebook Twitter Pinterest LinkedIn Tumblr Email
James Qu
  • Website

James is a seasoned Photoshop expert with over 25 years of experience, mastering the software since its 5.0 version. As the driving force behind PSD Vault, he authors the majority of its in-depth tutorials and insightful articles.

Related Posts

Create Colourful Fiery Portrait in Photoshop

May 7, 2025

How to Swap Faces in Photoshop Quickly & Seamlessly

May 2, 2025

How to Use Photoshop’s AI Content-Aware Crop for Perfect Image Transformation

April 26, 2025

3 Comments

  1. Bijutoha on September 3, 2013 7:33 PM

    Amazing thoughts with perfection .

  2. Rodney D. Doss on January 22, 2017 4:21 PM

    your tutorial is good value for me …Because we are Photoshop related work.

  3. Jacky Risham on September 18, 2017 11:48 PM

    Thanks for sharing a valuable tutorial

Don't Miss

How to Resize Images Without Losing Quality in Photoshop 2025

May 17, 2025

The Beginner’s Guide to Photoshop AI Masking Tool

May 10, 2025

Curves or Levels: Choosing the Right Tool for Stunning Edits

May 9, 2025

For Beginners

Basics

How to Resize Images Without Losing Quality in Photoshop 2025

By James QuMay 17, 20255 Mins Read

Curves or Levels: Choosing the Right Tool for Stunning Edits

May 9, 2025

Photoshop Clipping Masks – Everything You Need to Know

May 8, 2025

10 Photoshop Blur Gallery Tricks That Will Make Your Photos Look Professional

April 26, 2025

You May Also Like

Photo Effect

Create Colourful Fiery Portrait in Photoshop

By James QuMay 7, 20254 Mins Read
Photo Effect

How to Swap Faces in Photoshop Quickly & Seamlessly

By James QuMay 2, 20253 Mins Read
AI

How to Use Photoshop’s AI Content-Aware Crop for Perfect Image Transformation

By James QuApril 26, 20255 Mins Read
Facebook X (Twitter) Instagram Pinterest
  • About Us
  • Get in Touch
  • Advertise
  • VIP Area
  • Privacy Policy
  • Terms & Conditions
© 2025 PSD Vault. All Right Reserved.

Type above and press Enter to search. Press Esc to cancel.

Manage Consent
To provide the best experiences, we use technologies like cookies to store and/or access device information. Consenting to these technologies will allow us to process data such as browsing behavior or unique IDs on this site. Not consenting or withdrawing consent, may adversely affect certain features and functions.
Functional Always active
The technical storage or access is strictly necessary for the legitimate purpose of enabling the use of a specific service explicitly requested by the subscriber or user, or for the sole purpose of carrying out the transmission of a communication over an electronic communications network.
Preferences
The technical storage or access is necessary for the legitimate purpose of storing preferences that are not requested by the subscriber or user.
Statistics
The technical storage or access that is used exclusively for statistical purposes. The technical storage or access that is used exclusively for anonymous statistical purposes. Without a subpoena, voluntary compliance on the part of your Internet Service Provider, or additional records from a third party, information stored or retrieved for this purpose alone cannot usually be used to identify you.
Marketing
The technical storage or access is required to create user profiles to send advertising, or to track the user on a website or across several websites for similar marketing purposes.
Manage options Manage services Manage {vendor_count} vendors Read more about these purposes
View preferences
{title} {title} {title}