In this tutorial, I will show you the processes of creating this “Dark Power Unleashed” Surreal Digital Art in Photoshop. We will start from a simple city image, and combine it with cloud, model and several other objects to form this surreal effect. Have a try!
The PSD file of this tutorial is available to buy on PSD Vault Shop, or via the PSD Vault VIP members area.
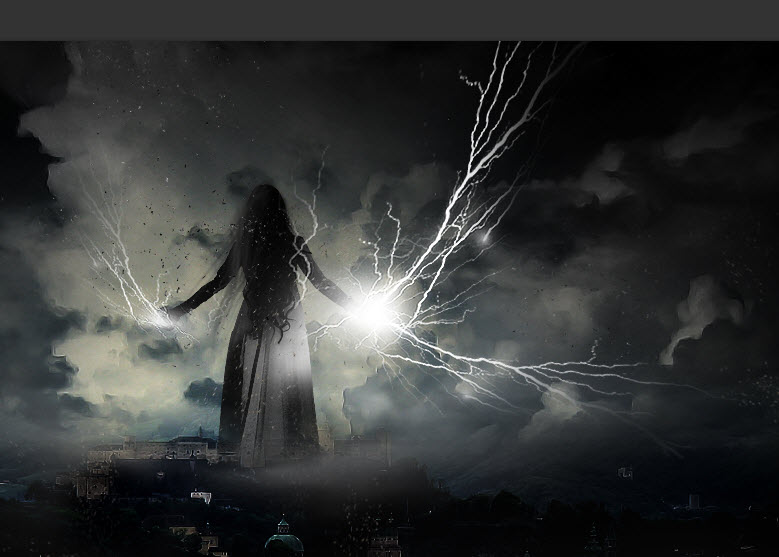
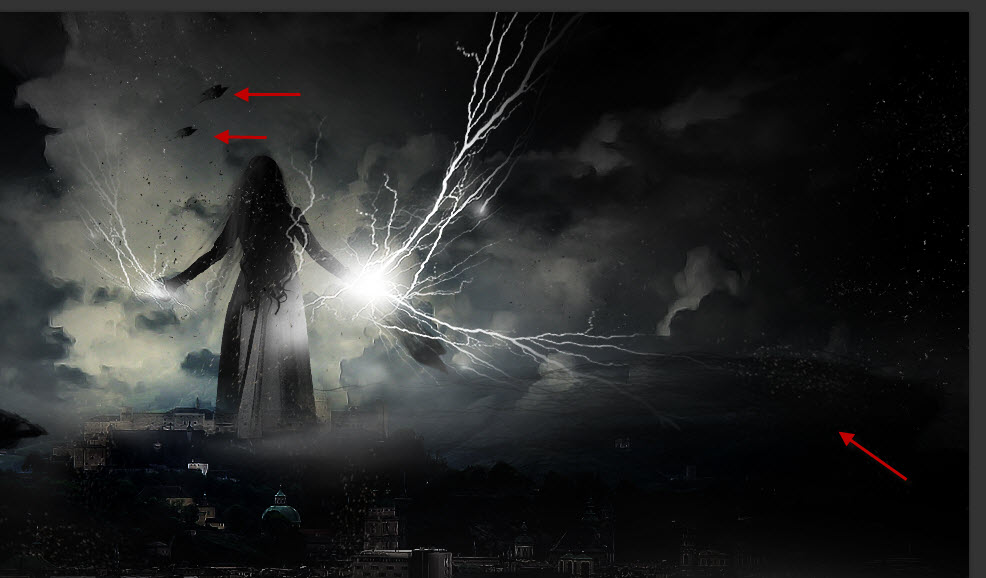
Here is a preview of the final effect I have for this tutorial: (click to enlarge)

PSD Vault VIP Membership
You can download the PSD File for this tutorial via the VIP Members Area for only $6.95/Month (or less)! You will not only get this PSD File, but also 200+ other PSD Files + Extra Goodies + Exclusive Photoshop tutorials there. Signup now and get exclusive!

Note: If you have difficulty with Step 4, please check out this video tutorial below:
OK Let’s get started!
To complete this tutorial, you will need the following stocks:
Step 1
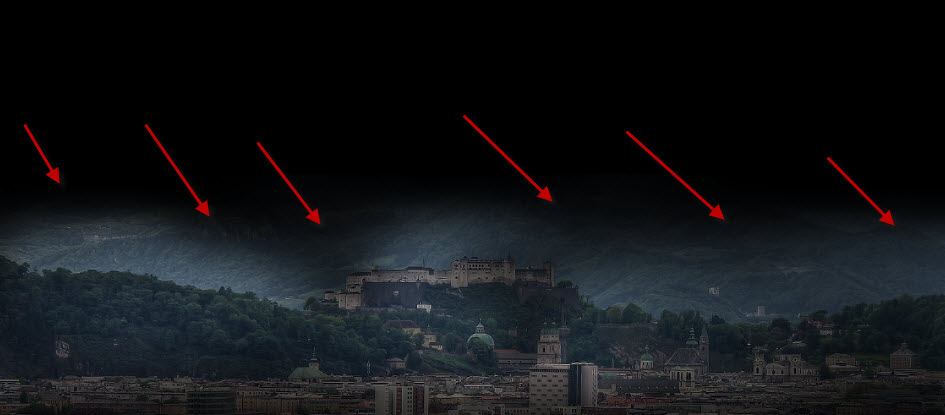
Create a new document sized 1400px * 620px with black background. Load the city image into Photoshop and use the Rectangular Marquee tool to select the following city part of the image:

Copy and paste the selection over to our document, re-size and position it as shown below:

Use a soft eraser to fade the top of this city layer as shown below:
Load the cloud image into Photoshop and select the top area containing the cloud, copy and paste it over to our document, re-size and position it as shown below:

We want to get rid of the street lamp. Use the Clone Stamp Tool with the following settings:

![]()
Hold down your Alt key and define a cloudy area:

Then use the brush to paint over the street lamp to remove it from our image:

Use a soft eraser to fade the cloud edges as shown below:

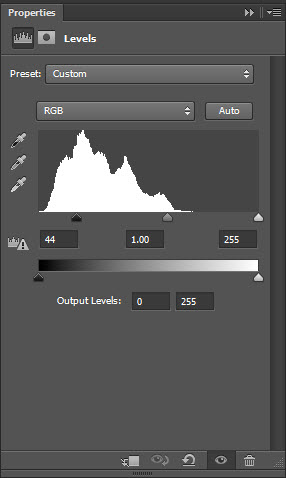
Add the following adjustment layers on top of all previous layers:
Black and White

Layer mask on this black and white layer:

Levels
Curves

And here is the effect so far:

Step 2
Load the model image into Photoshop and select the model body:

Copy and paste the selection to our document, re-size and position it int the centre:

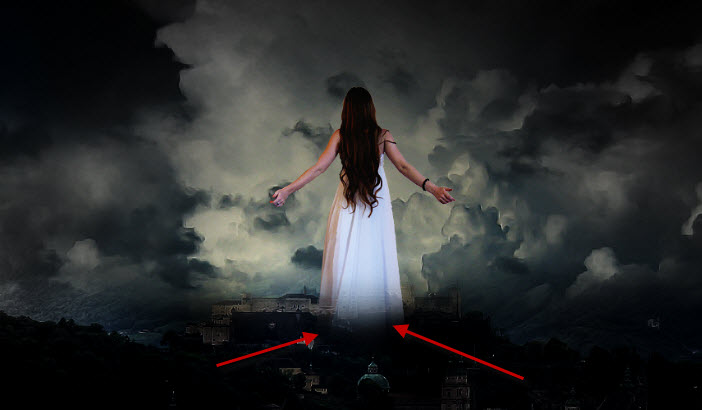
Use a soft eraser to remove the bottom area of the model as shown below:
Add the following adjustment layers as clipping masks to this model layer:
Black and white

Levels

Layer mask on the levels adjustment layer:

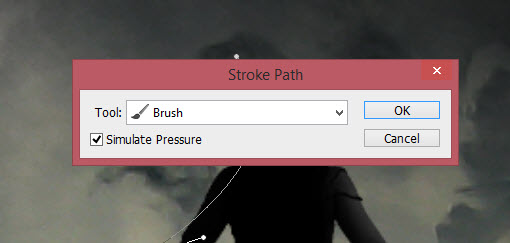
We will add some hair for the image. To do this, use the Pen Tool draw a path as shown below:

Use a 3px black brush:
![]()
and stroke this path as shown below:

and you will have the following effect:
We will repeat this above process to add more hair, make sure you adjust the colour and size of the hair for best effect:

and here is the overall effect so far:

Step 3
We will add some particles around canvas. Load the rock image into Photoshop and create a new layer on top of its background layer:

Use the debris brush you download:

And paint some debris on the new layer:

Ctrl+Left-click on the layer thumbnail to select this layer:

Go back to the background layer while maintaining the selection:

Add some more debris on the left and right side of the image:


We can also add some subtle cloud effect down the bottom of the canvas with a cloud brush or the cloud filter:

Step 4
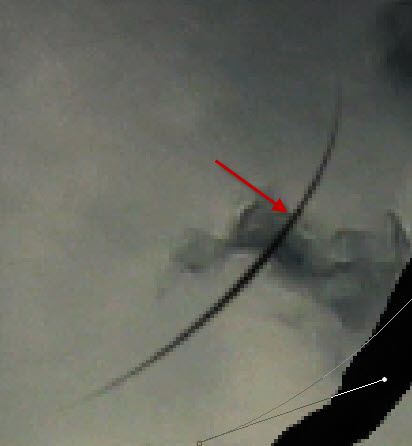
We will add the lightning effect to our image in this step. Load the lightning image into Photoshop and select the following portion with a 30px feather Lasso Tool:

Copy and paste the selection to our document and re-size and rotate it as shown below:

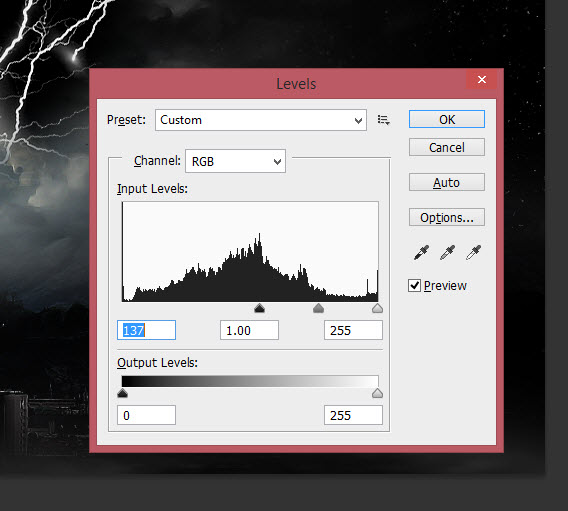
Apply the following black and white filter to it:

Then apply the levels adjustment to it:
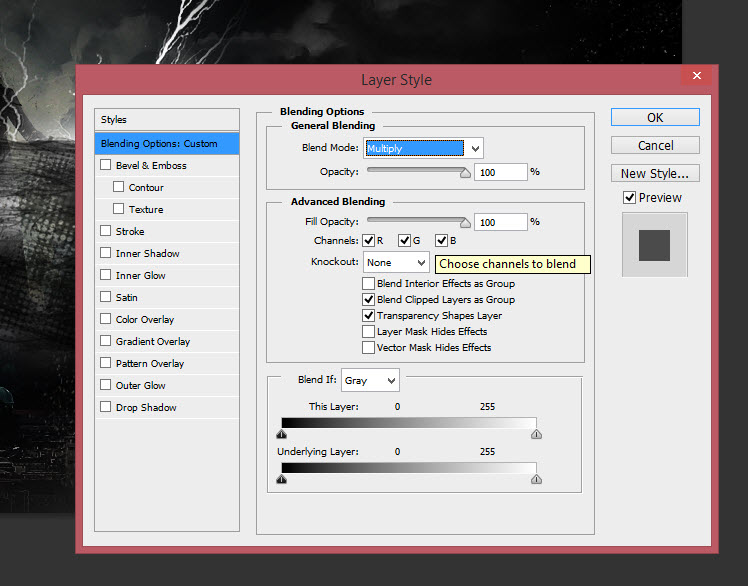
Set the layer blending mode to this layer to “Screen”:

And here is the effect you will have:

Repeat the above step and add more lightning effect to the image:
Step 5
We will add this crow image into the mix in this step. Load the image into Photoshop and select it:

Copy and paste it over to our document and set its layer blending mode to “Multiply”:
Re-size and position this layer to the location shown below:

Add a few more crows to the image as shown below:
We can also utilise the black lines from the crow image and attach them to the model to form this effect as shown below:

Step 6
We’re almost done! For final touches, we will flatten the image and duplicate the background layer, apply the following “Accented Edges” filter to this duplicated layer:

Set the layer blending mode of this duplicated layer to “Pin Light”:

And you will see the edges is now highlighted:

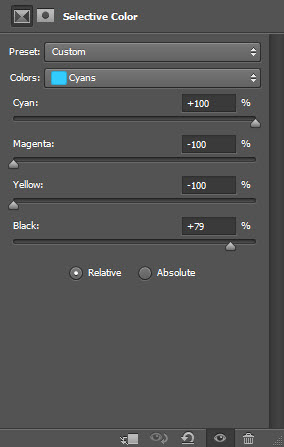
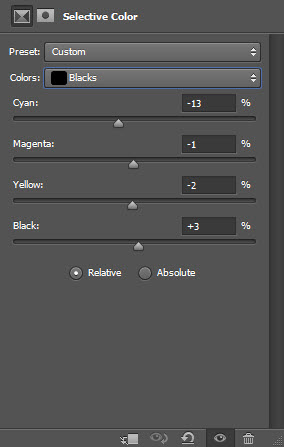
Add the following Selective Color adjustment layer on top to add some colours to the image:


and here is my final effect: (click to enlarge)
That’s it for this tutorial! Hope you enjoy going through it and find it useful. Drop me a comment below if you have any question.
Till next time, have a great day!
6 Comments
i like your work style . hopefully you will send me more concepts of digital designing
Gorgeous work! Beautiful tutorial, thanks for sharing.
i like this technical
http://bit.ly/1A0YzlO
Very very cool.
Same here.
Too much helpful tutorial.Thanks for the post.